
The DreamPi video tutorial is here! I’ve created this video to make it as simple as possible to get your Dreamcast online using the best method available to-date. Below is a description of what DreamPi is, a list of the parts you’ll need, and the video tutorial itself. I hope this proves helpful! If you have any issues, please post in this Dreamcast-Talk forum thread.
What is DreamPi?
DreamPi is custom software for the Raspberry Pi mini computer that was created by Luke Benstead a.k.a Kazade. It transforms your existing high-speed internet service into a dial-up connection that can be used by your Dreamcast. While there have been other methods of doing this in the past, DreamPi is by far the easiest and cheapest method. It’s also a lot more polished and streamlined than the other methods and includes a service called Dreamcast Now that allows you to see when other DreamPi users are online and what they’re playing. Once you’re online with DreamPi, you’ll be able to play any of the currently online Dreamcast games as well as browse the web using PlanetWeb, Dreamkey, or XDP.
What you’ll need:
- Raspberry Pi (Any model with an Ethernet port)
- Linux-Compatible USB Voice Modem (e.g. Dell NW147)
- Line Voltage Inducer (or) 1x Telephone Line Simulator (e.g. Viking DLE-200B)
- 4GB or Larger SD or MicroSD Card (The Raspberry Pi 1 uses a standard SD card and the Raspberry Pi 2 & 3 use MicroSD)
- RJ-45 Ethernet Cable
- Micro USB Cable
- RJ-11 Phone Cable (2 if you’re using a telephone line simulator)
- HDMI Cable (Optional)
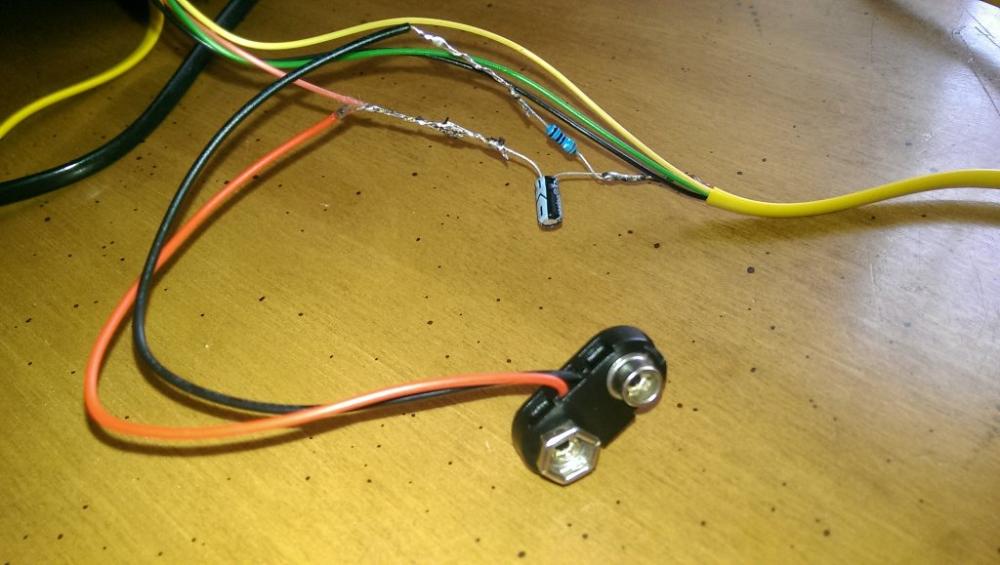
Line voltage inducer parts:
- 0.47uf – 1uf Electrolytic Capacitor
- 330 Ohm – 390 Ohm Resistor
- 9v Battery Connector (2 if you’re using a PAL Dreamcast)
This is what your line voltage inducer should look like after soldering:
You can also purchase a line voltage inducer from the Dreamcast Live Shop if you don’t want to build one yourself.
Chapter index:
0:55 – The Parts
2:39 – Building a Line Voltage Inducer
4:40 – Installing the DreamPi Image
7:22 – Hooking Everything Up
8:50 – Dreamcast Configuration
10:11 – Dreamcast Now
Installing the DreamPi image using another OS:
Mac: https://www.raspberrypi.org/documentation/installation/installing-images/mac.md
Linux: https://www.raspberrypi.org/documentation/installation/installing-images/linux.md